
Step 1: Create an account
Create an account on UXsniff; it’s free. Enter your email and password, or simply use Google Connect to create your account with just one click.
Step 2: Verify your email
We will send a verification email to your inbox. Please verify your email by checking your inbox and clicking on the verification link.
Step 3: Enter your website URL
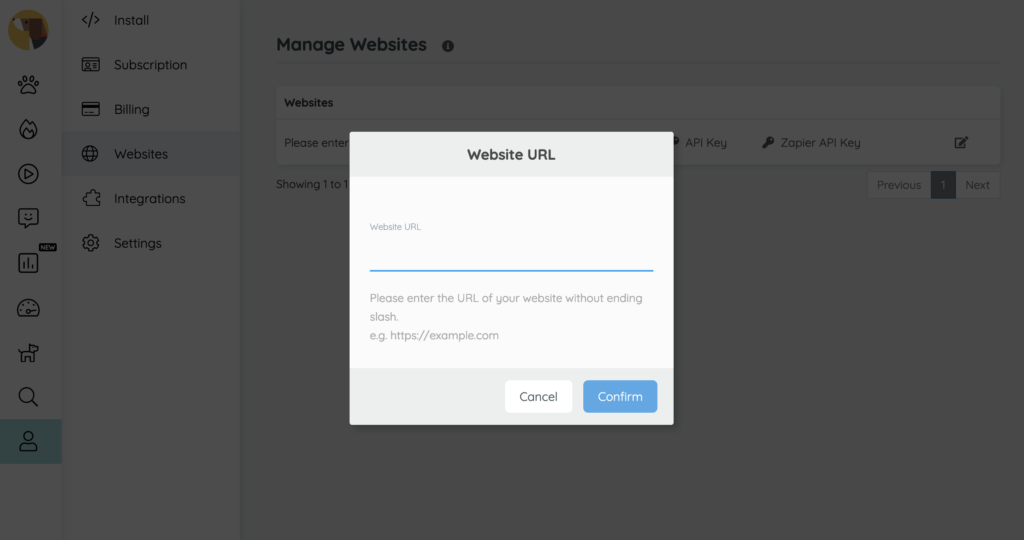
Enter your website URL without a trailing slash (e.g., https://example.com).
Please note that you have to enter the URL of the website you are currently running or managing. Ownership verification will be required later by installing the UXsniff snippet on the website. Therefore, entering a competitor’s website URL or a website you don’t have access to will not work.
Step 4: Install UXsniff snippet

To install the UXsniff tag on your website, simply copy and paste the snippet into your website’s header or footer. Alternatively, you can install the snippet using WordPress plugin or Google Tag Manager.
If you are using Wix or Shopify, please refer to the setup guide specific to these platforms.
Once you have completed the installation, click on the “I have installed the tracking snippet” button to verify the tracker. If you are using a CDN or caching plugin, please remember to purge your cache; otherwise, UXsniff will not be able to detect the snippet on your website.